Work plan
- Know the game of the pong
- Customize the characters
- Movement of the characters
The Pong game: The ball
The Pong is one of the first videogames that was created. You can have levels of difficulty, one or two players, penalizing or adding lives … In this module we will discover the basic tools to build one. We will start with a simple version and from there we will be doing it more and more complex. We see an example of Pong made with the Scratch:

![]() Let’s do it step by step
Let’s do it step by step
- We entered our Scratch account and created a new project with the name m2repte11
- We choose two new characters from the gallery, which will be the ball and the racket, we can choose the characters “Ball” and “Paddle”
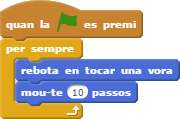
- The ball must move around the stage, so if it touches any of the walls it has to bounce. We already saw how to do it in module 1:
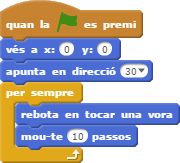
- We have to put an initial position on it, which we must always do with all the characters. If we do not do it, the character will start wherever he lasted.
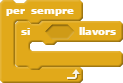
- We also have to tell the ball in which direction we want it to start. If we do not say anything, it will only go from right to left which is the default address:
Challenge 1 ![]()
As we have the ball now it always does the same route; predictable and boring. Let the starting point be random, but that the “y” is always above 100. We also make the direction not fixed, but rather it is random, but starting at the bottom, for example, between -60 and 60
![]() Track: Let’s remember the random number operator and the “wind rose” of the Scratch directions that we saw in module 1 in session 7.
Track: Let’s remember the random number operator and the “wind rose” of the Scratch directions that we saw in module 1 in session 7.
And the racket?
Now that we have the program of the ball, we need to program the movement of the racket.
![]() Let’s do it step by step
Let’s do it step by step
- We continue with the project m2repte11
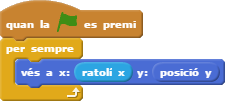
- An option to program the movement of the racket is to use the position of the mouse, which we can know with the mouseblock X of the category Sensors :

- In this way, the racket program would look like this:
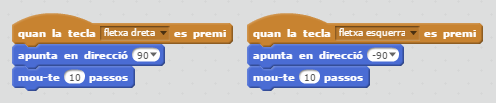
- Another option we can use is to move the racket with the keyboard. To do this we use keyboard events:


- In this way, the racket program would look like this:
Challenge 2 ![]()
When we tested this last program of the racket we see that if we keep one of the keys pressed there is a small movement, then a small pause and finally the continuous movement of the racket. We have to solve it using the keyboard sensors at m2repte11 :


![]() Track: Sensors should always be used within a loop so that the program is continually checking if it is activated:
Track: Sensors should always be used within a loop so that the program is continually checking if it is activated: